
Atish is a seasoned tech enthusiast fueled by caffeine and a Computer Science engineering degree. He stumbled into the blogging world in 2015 and hasn't looked back. Over 2000+ articles later, his work has been featured on sites like Gizbot, Firstpost, PhoneArena, GSMArena, and IBTimes. At GT, he's your go-to guy for how-tos, invaluable tips, and troubleshooting guides that actually work. He's also an SEO and digital marketing whiz and content strategist, so his tech takes are always on point and ethical. Learn about our Tech Review Board
Microsoft Teams is an essential platform for virtual meetings, webinars, and collaborative work. In addition to recording these sessions, knowing where to find the recordings is crucial for reviewing, sharing, and documenting the results after the meeting. In this article, we’ll explore how to locate where Teams recordings are stored and why you might want to access them. Before we dive into the process, let’s understand the significance of accessing Teams recordings. Accessing Teams channel or non-channel meeting recordings is essential for several reasons. It is common practice to revisit, cite, and review content without omitting essential details. Moreover, you can share these recordings with individuals who may not have been able to attend the meeting but need access for compliance or documentation purposes. There are various uses for meeting recordings, making it imperative to know the location for Teams meeting recordings. With this knowledge in mind, let’s proceed with the article.
Knowing where to find and view Teams recordings is crucial if you want to access or share the recordings. Follow the below-mentioned steps. Step 1: Press the Windows key on your keyboard, type Teams, and click Open. Note: If you are on Mac, press ‘Command + Space’ to Spotlight search Teams and launch it. 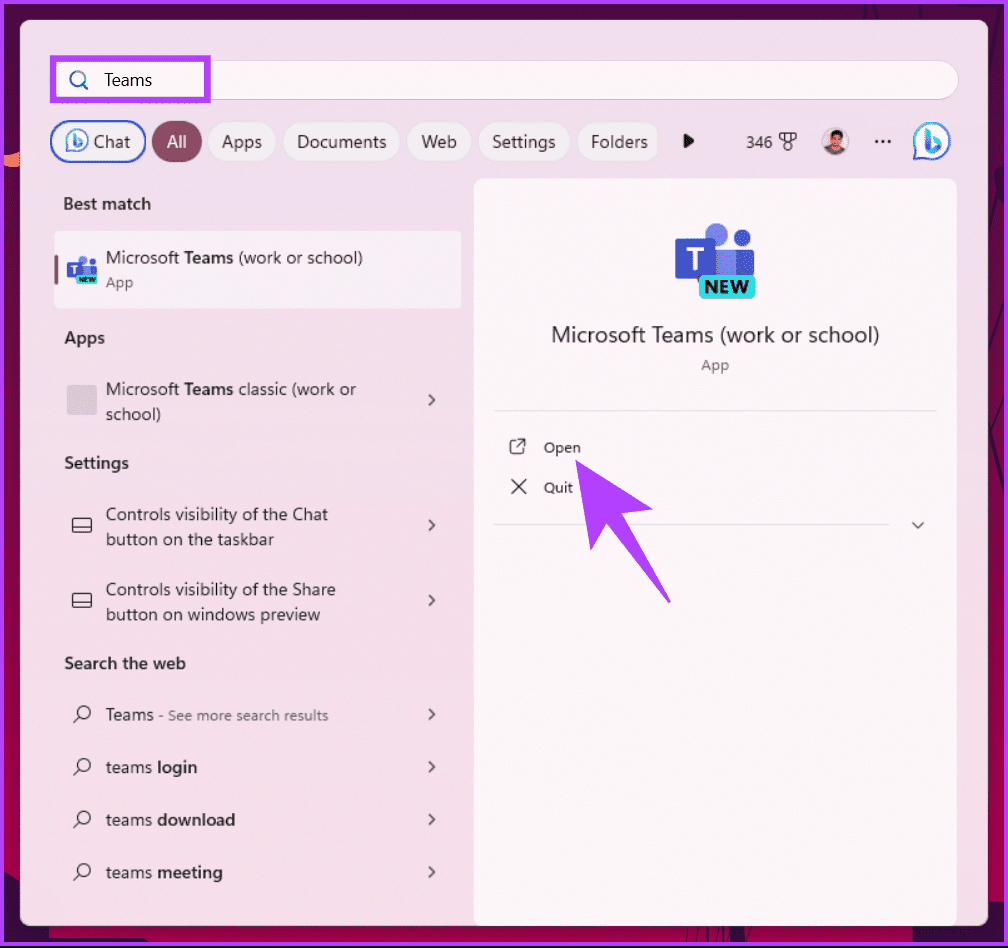 Step 2: Navigate to Teams from the side pane.
 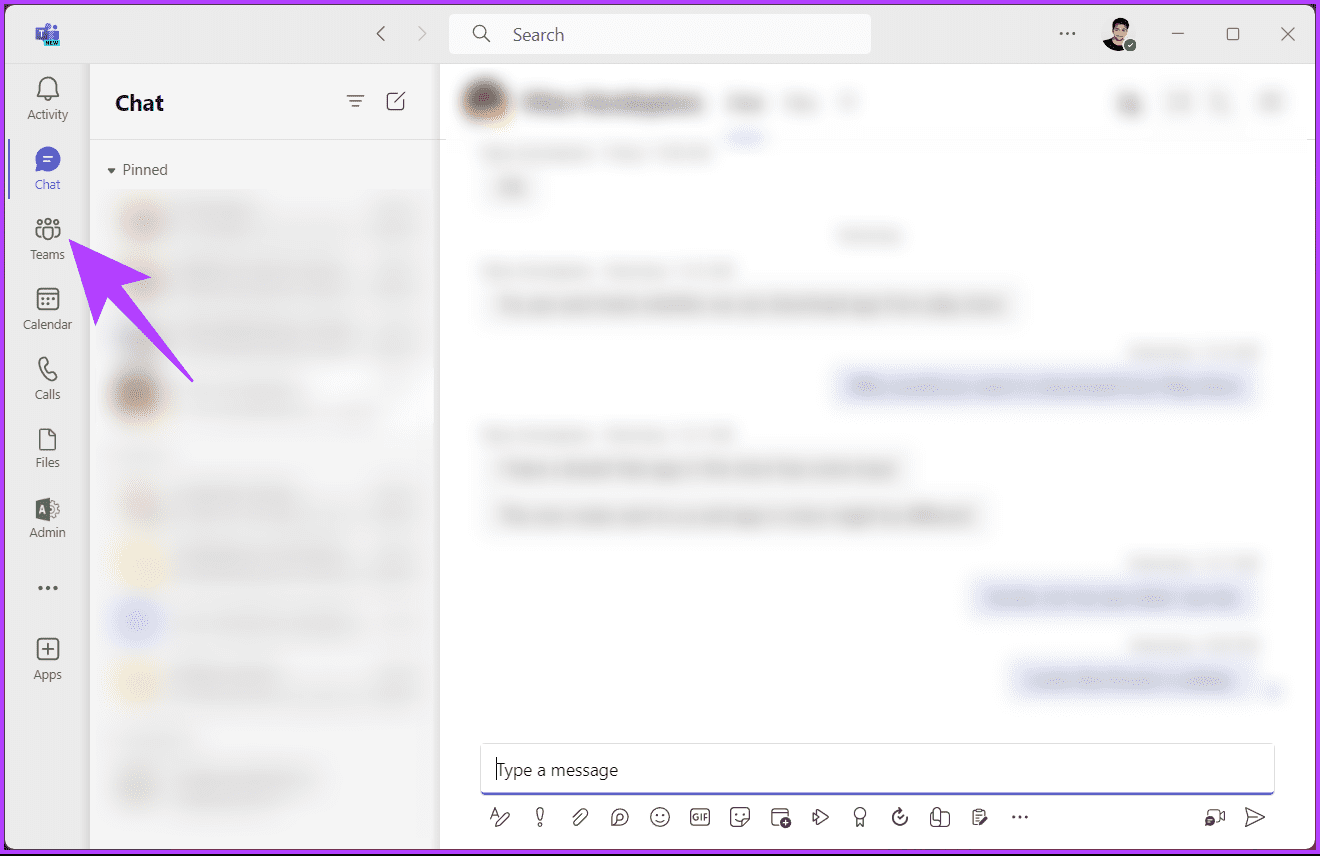 Step 3: Now, choose the Teams you wish to access recordings of and proceed to the channel that hosted the meeting. Step 4: Once in the channel, click on the Files tab at the top.
 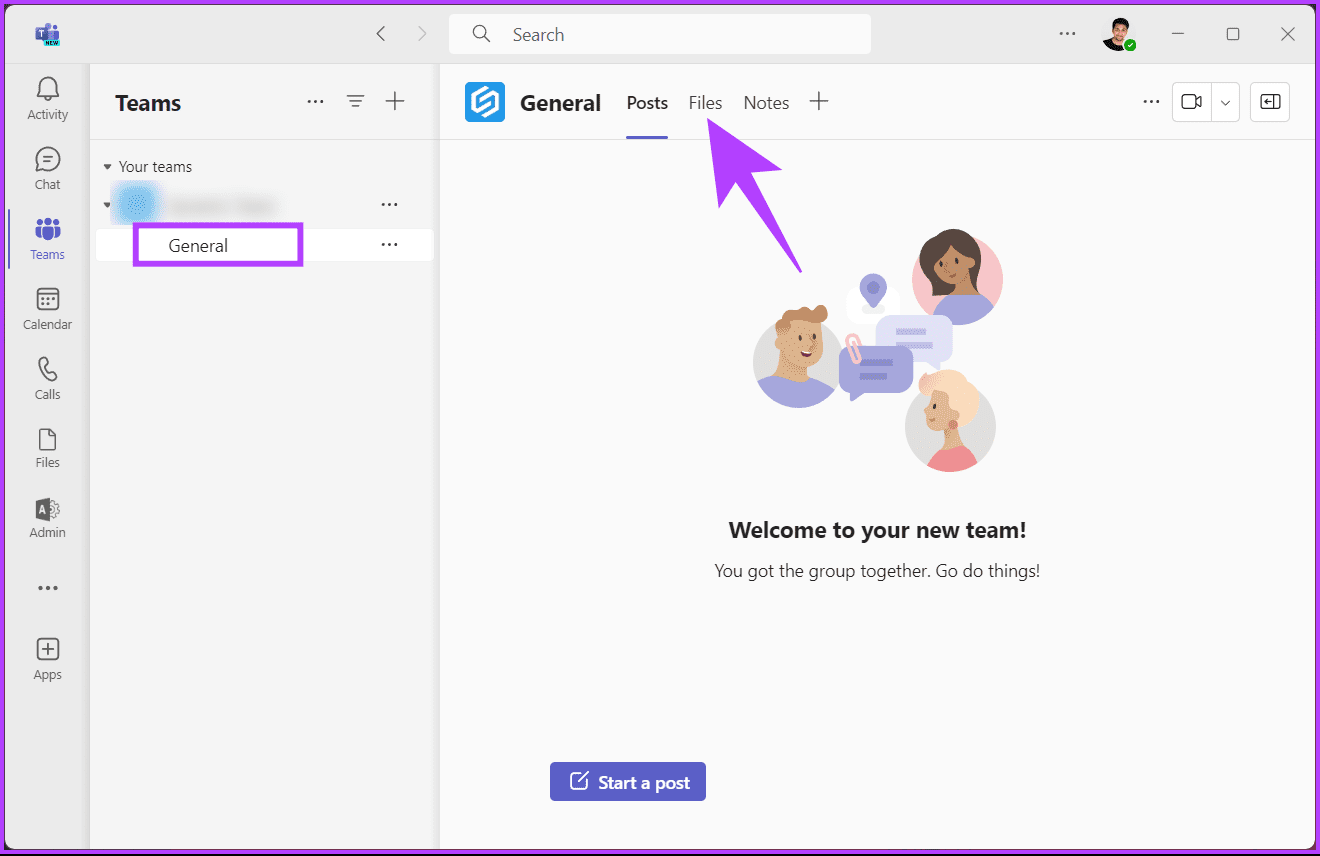 Teams will take a bit to load folders associated with the channel from Sharepoint. You can click on the Recording folder that Teams use to save all the recordings. From here, you can share, download, or delete the recordings, provided you have the essential permissions to do so. This was the case when Teams Channel was existent. What if the meeting you had was not part of any Teams channel? Continue reading.
Recordings of non-channel meetings are saved in the OneDrive folder of the person who hosted the meeting or who started the recording. So, only the host has access to the recording. That said, there are two scenarios to find and view recorded meetings in Teams (non-channel); one is when you are a host, and the other is when you are just a participant. Let’s start with the first-case scenario. Note: If you are the host, you can use any of the methods mentioned below to access the recordings.
Step 1: Go to Microsoft Stream and log in with the appropriate credentials. Go to Microsoft Stream Step 2: Click on My Content and select Meetings from the drop-down menu. 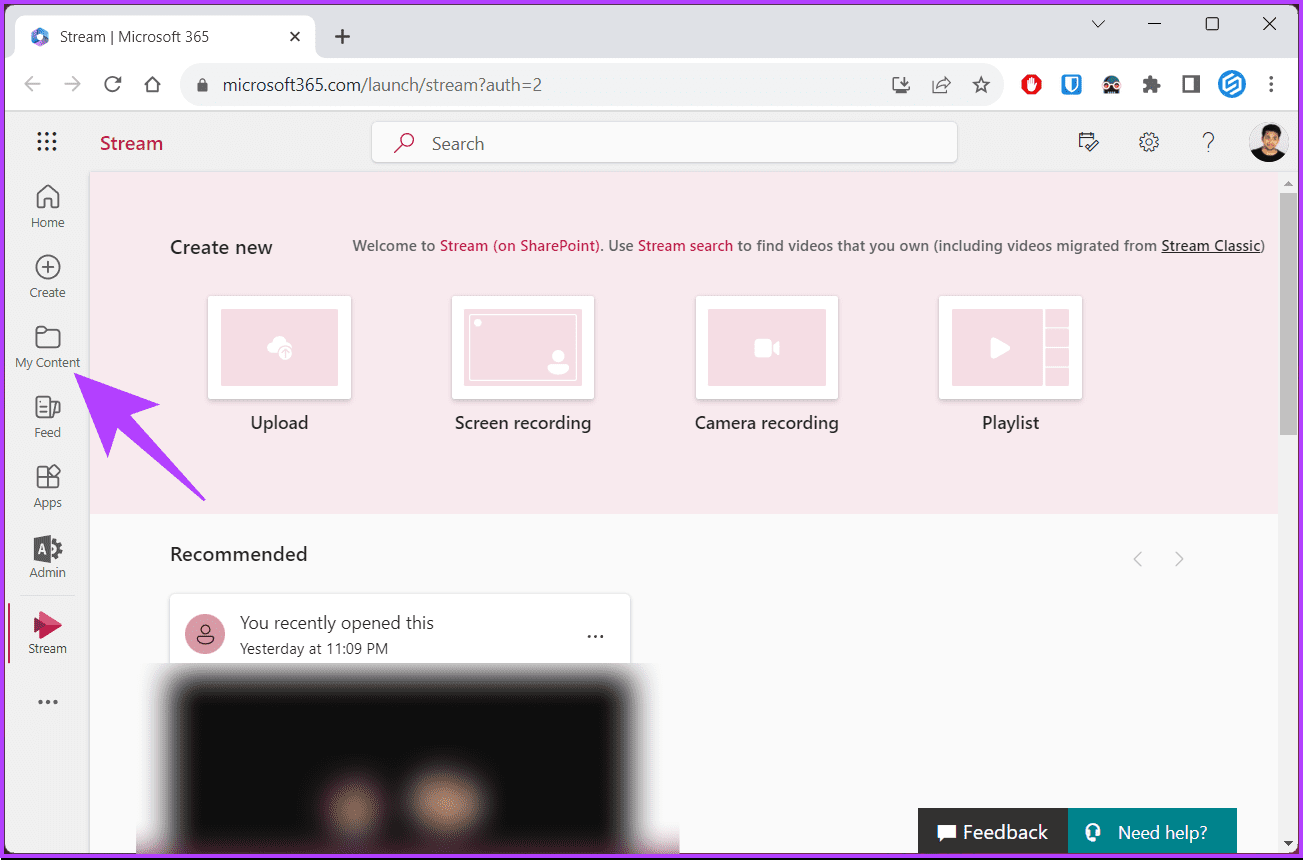 Step 3: Under Locations, navigate to Cloud files and click on it.
 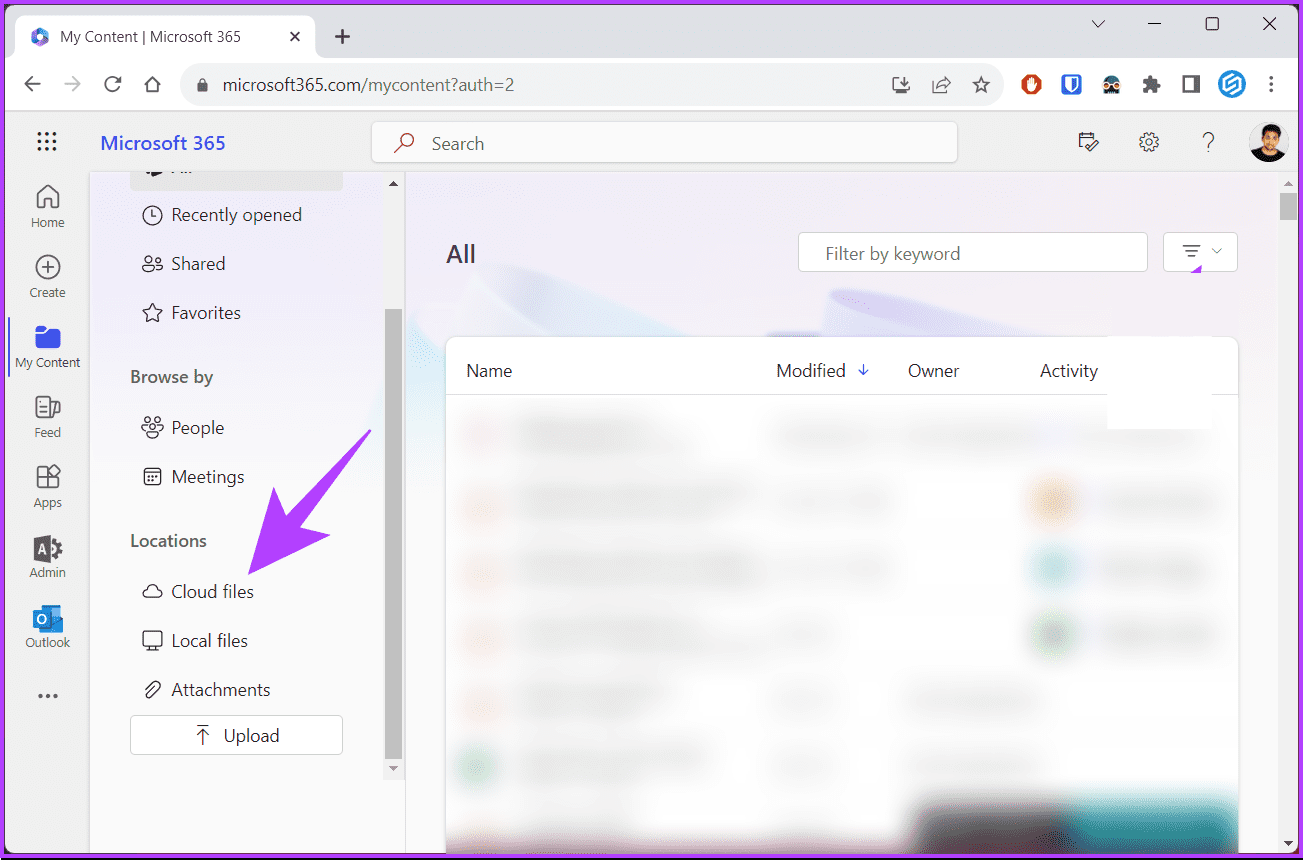 Step 4: Click on the Filter icon.
 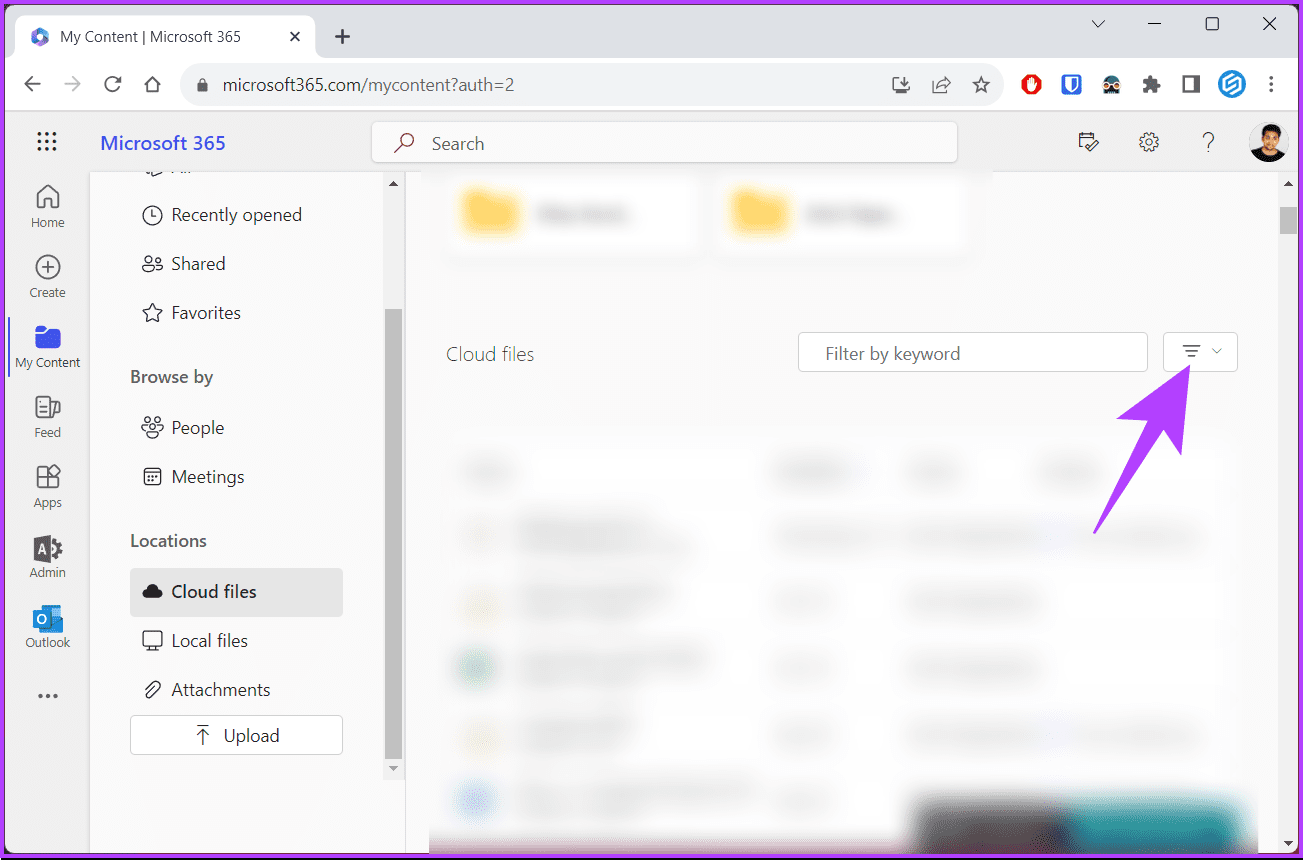 Step 5: From the drop-down, select Videos and select from the list of recordings or videos you have on your OneDrive.
 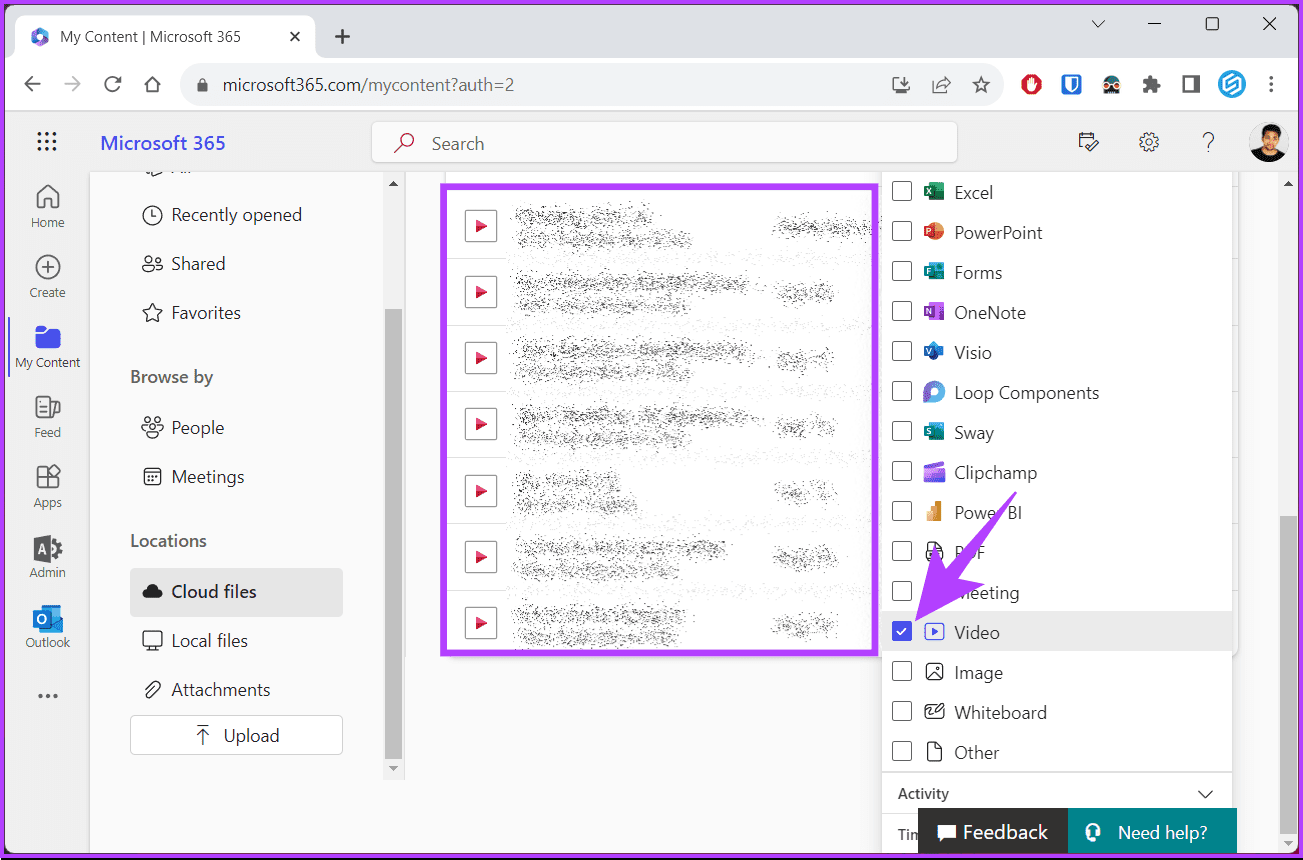 This was the case when you were the host of a meeting. What if you were an attendee? Continue reading.
Even though you are a participant and not the host, you can access the recorded video on Microsoft Teams. Follow the instructions below. Step 1: Launch Microsoft Teams on Windows, Mac, or the web. By default, you will land on Teams Chat. Step 2: Navigate to the auto-created meeting group (the system automatically adds invitees). 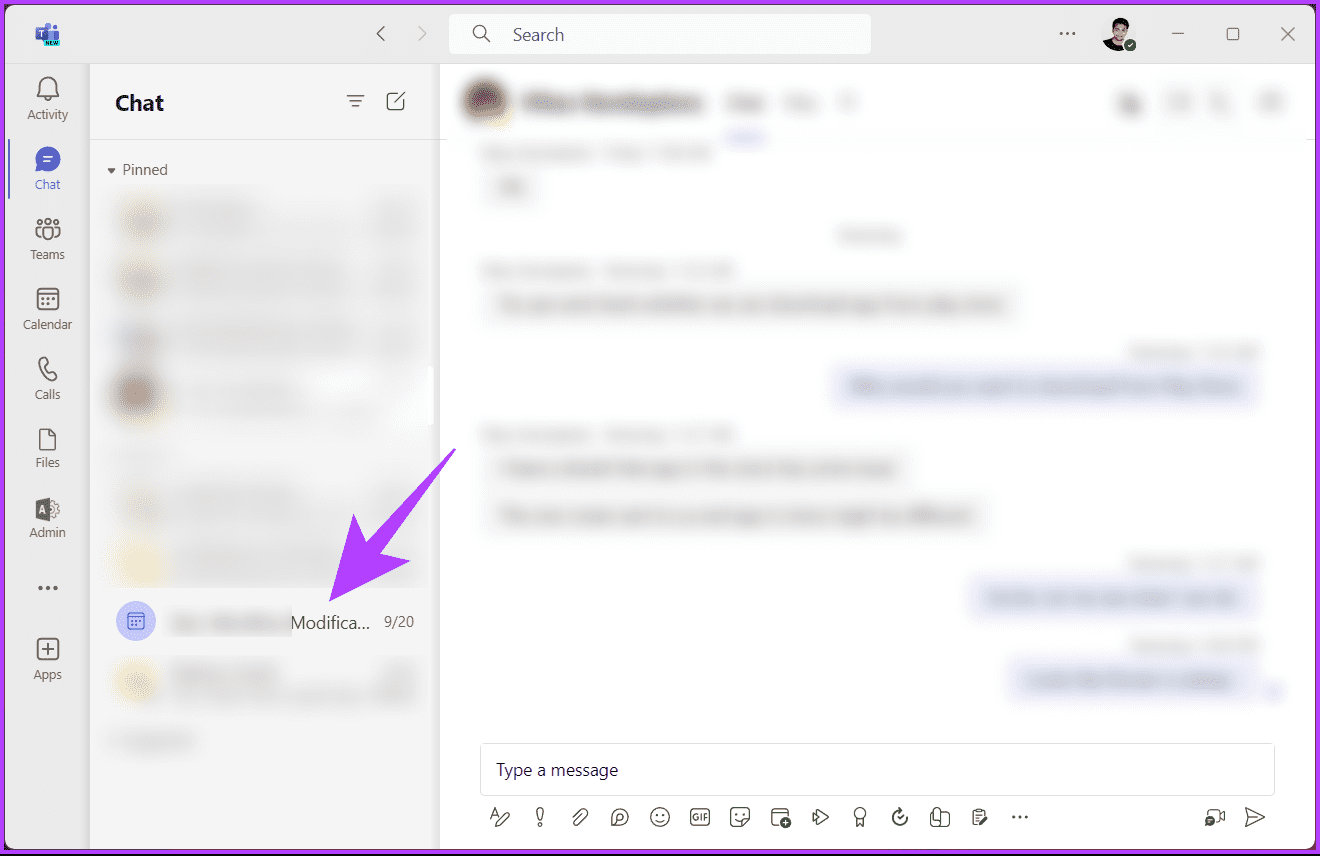 Step 3: Right-click on the video or click on the three-dot icon, and from the menu, choose ‘Open in Stream.’
  That’s it. You can easily access the recorded meeting from the meeting group created (if not on the already existing Teams Channel). It is important to note that you can only view the recording. If you want to download it for your reference, you need to reach out to the host to provide you with access to download it. Also Read: Ways to export Microsoft Teams chat history
If you are the host of the meeting and one of your participants (such as secretaries) reached out to you for the meeting recording, here’s how to share the recordings with them. Follow the below steps. Note: We are assuming that the meeting was a non-channel Teams meeting. Step 1: Go to OneDrive and log in with the appropriate credentials. Go to OneDrive Step 2: From the side pane, go to My files. 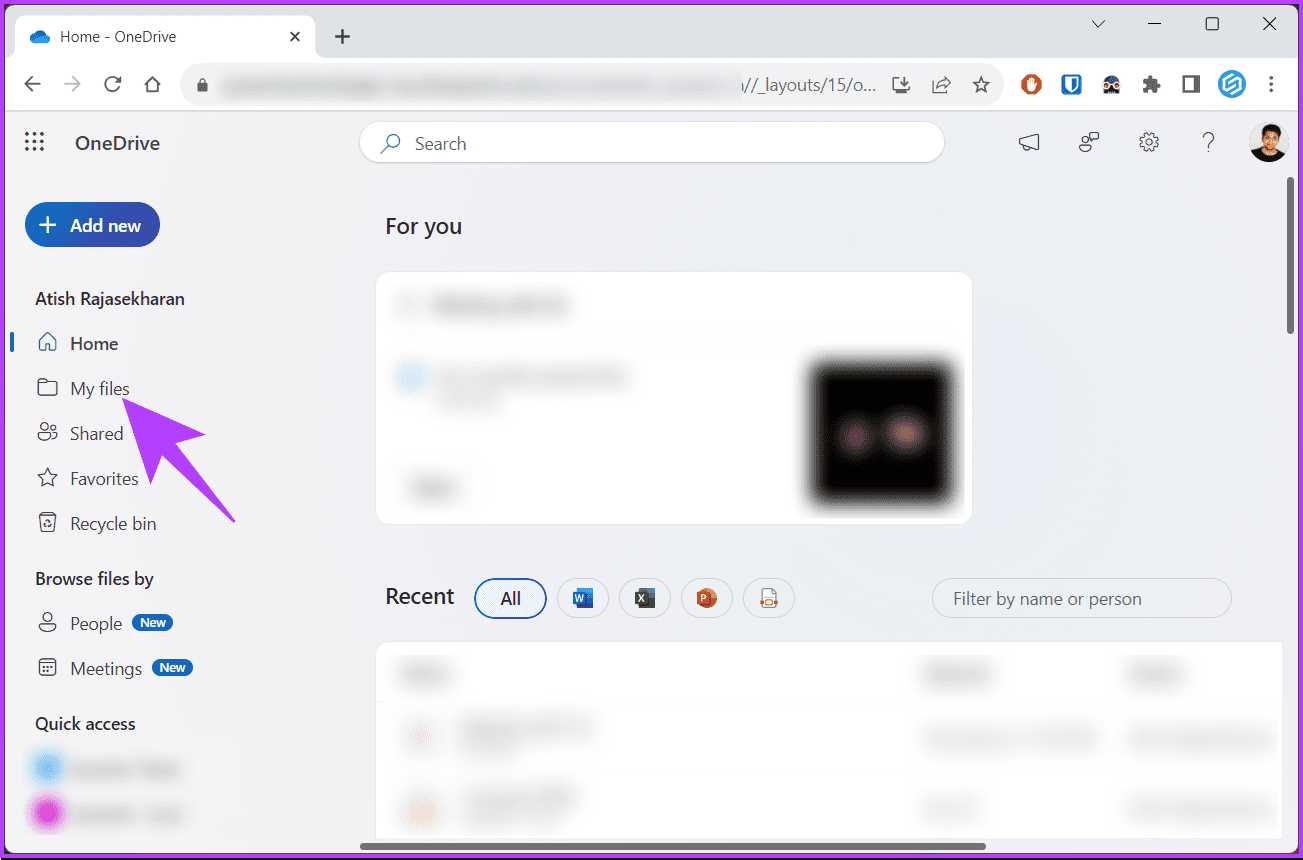 go to My Files" width="1303" height="860" />Step 3: Navigate to the Recordings folder.
 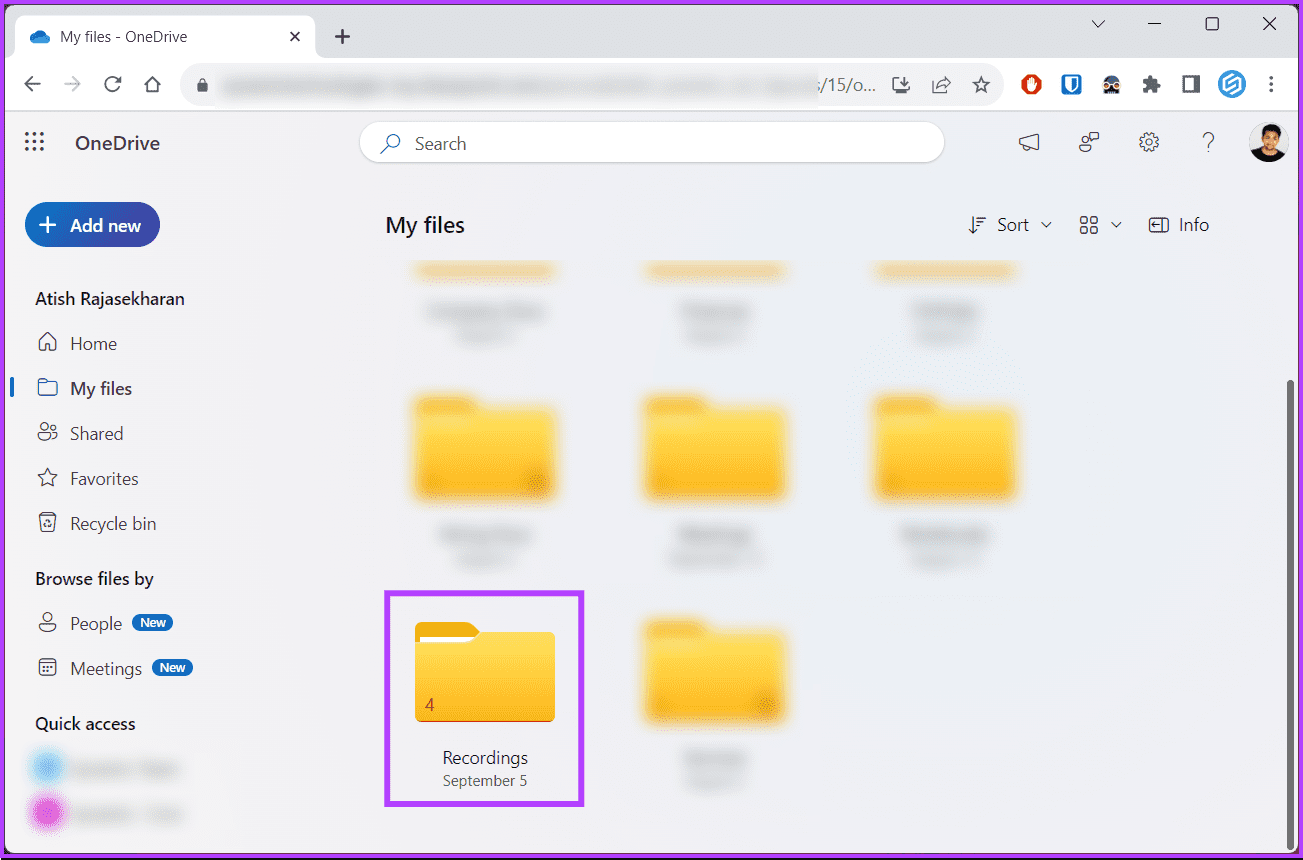 Step 4: From the list of recorded meetings, select the one you want to share and right-click on it.
 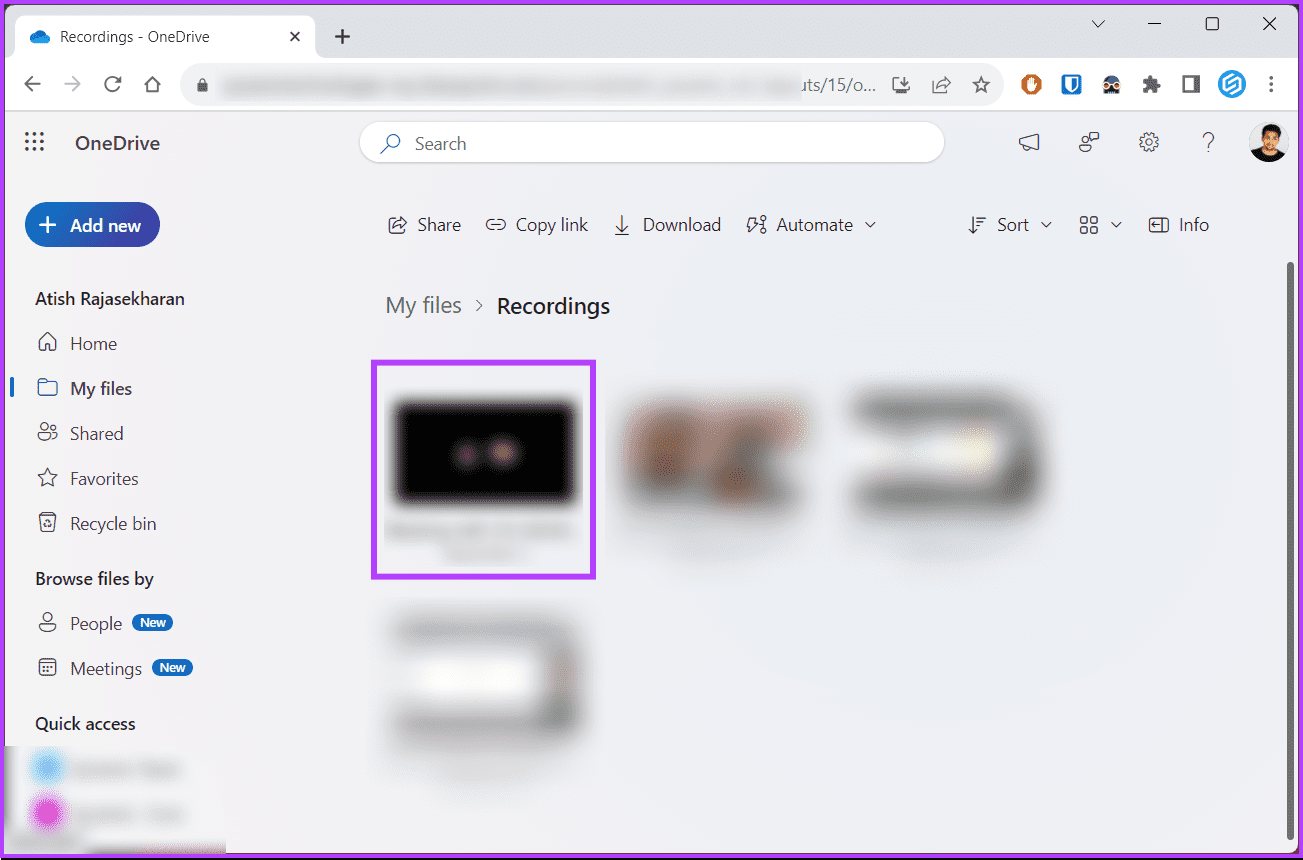 Step 5: From the drop-down menu, choose Share.
  Step 6: In the ‘Share [Meeting title]’ pop-up, click on the Copy link or Share button.
 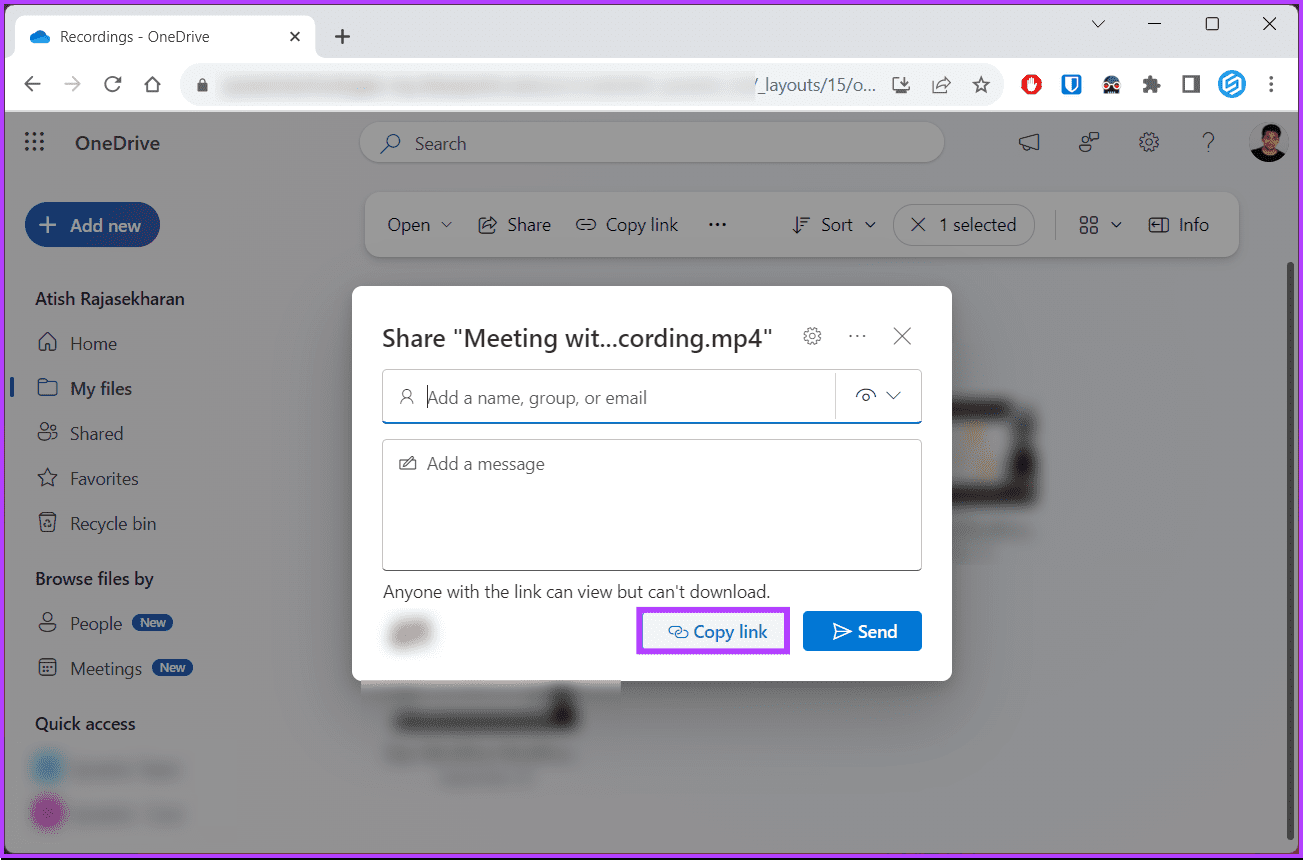 From here, navigate to the Teams chat, paste the recording link, and share it with the concerned people. If you are looking to download the recording and share it rather than copy-paste the link to chat boxes, continue reading.
Note: We are assuming that the meeting was a non-channel Teams meeting. Step 1: Go to OneDrive and log in with the appropriate credentials. Go to OneDrive Step 2: From the side pane, go to My Files. go to My Files" width="1303" height="860" />Step 3: Navigate to the Recordings folder. Step 4: From the list of recorded meetings, select the one you want to share and right-click on it. Step 5: From the drop-down menu, choose Download. 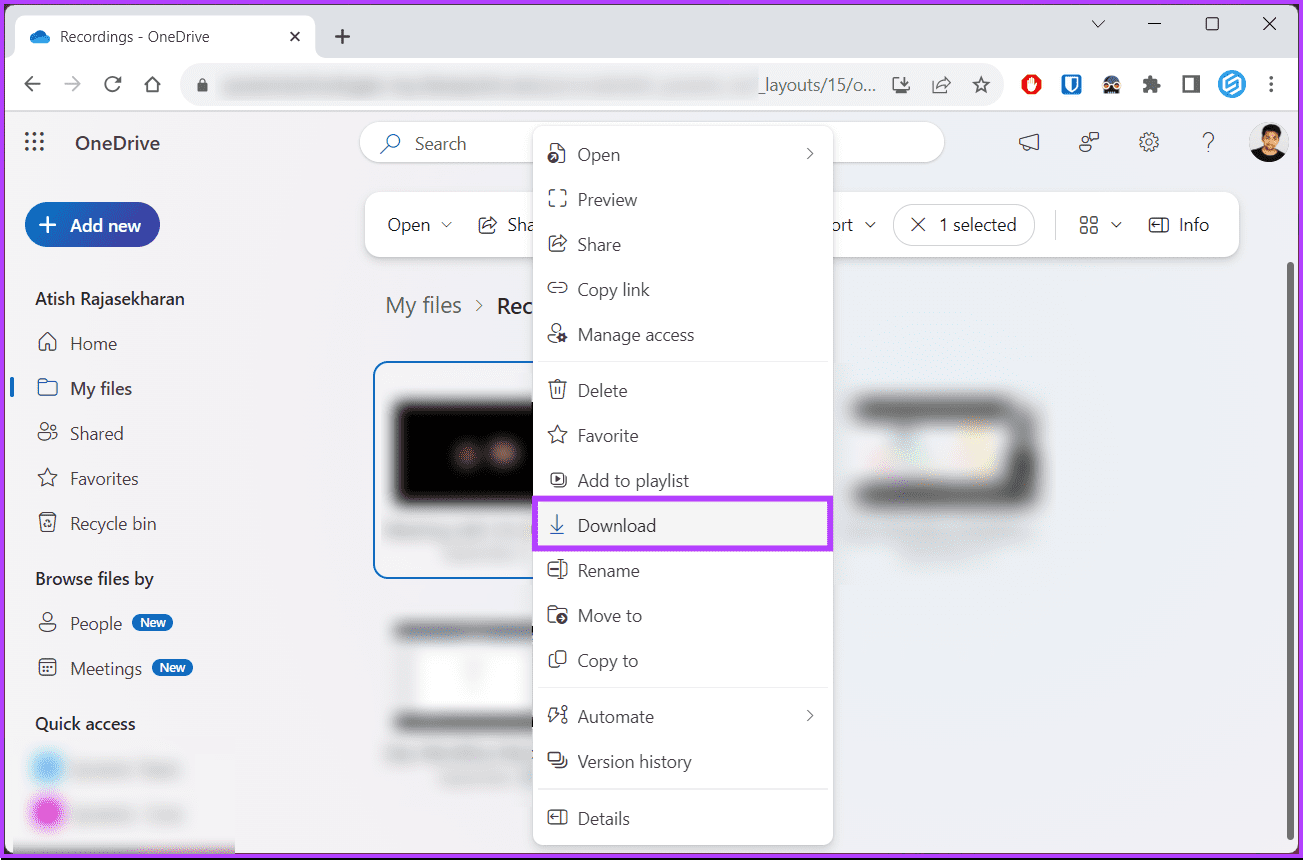 The recording will be downloaded automatically to the default storage location. Do note depending on the size of the video and your internet connection speed, the download timings may vary. Although Microsoft periodically cleans up all the recorded videos from Microsoft Stream, the one on OneDrive stays until you clear it from Teams (auto-created) meeting chat. If you are looking to delete it from OneDrive, keep reading. Also Read: How to change Microsoft Teams notification sound
Note: We are assuming that the meeting was a non-channel Teams meeting. Step 1: Go to OneDrive and log in with the appropriate credentials. Go to OneDrive Step 2: From the side pane, go to My Files. go to My Files" width="1303" height="860" />Step 3: Navigate to the Recordings folder. Step 4: From the list of recorded meetings, select the one you want to delete and right-click on it. Step 5: From the drop-down menu, choose Delete.  Step 6: In the pop-up, choose Yes.
 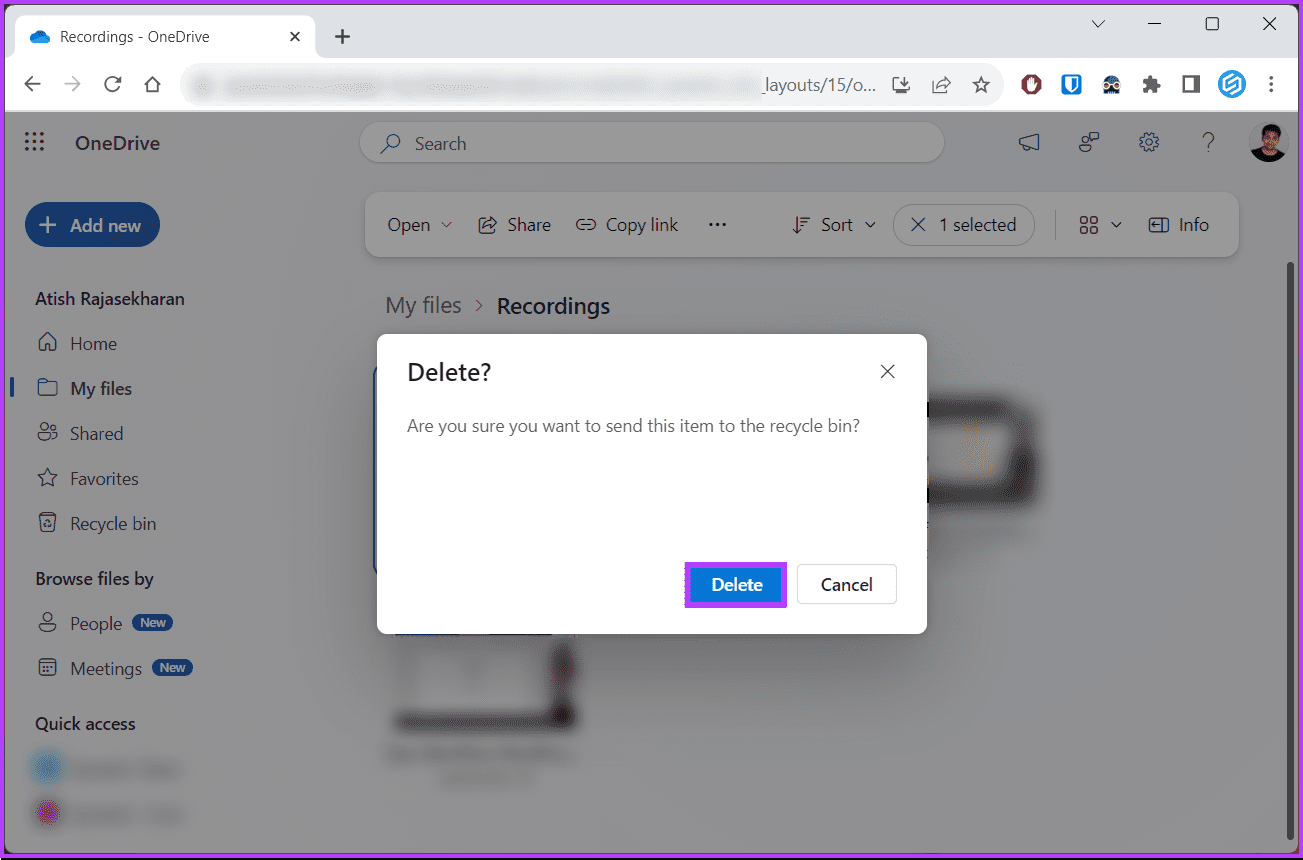 That’s it. Your recording will be deleted from OneDrive, which, if it was deleted mistakenly, can also be recovered from Recycle Bin. If you don’t want to delete the recording but instead want to move it to a different location, you can do that too; continue reading.
Note: We are assuming that the meeting was a non-channel Teams meeting. Step 1: Go to OneDrive and log in with the appropriate credentials. Go to OneDrive Step 2: From the side pane, go to My Files. go to My Files" width="1303" height="860" />Step 3: Navigate to the Recordings folder. Step 4: From the list of recorded meetings, select the one you want to move and right-click on it. Step 5: From the drop-down menu, choose Move to.  Step 6: From the pop-up modal, navigate to the location where you want to move the recordings and click the Move here button.
  There you go. You have successfully moved the Teams recording location without deleting it. That said, if you have any queries, check out the FAQ section below.
1. What if I can’t find my Teams recordings in Microsoft Stream? If you can’t locate your recordings in Microsoft Stream, ensure that your organization’s IT policies allow recording, and also check with your IT support team for assistance. They can help troubleshoot any potential issues.
2. Are Teams recordings stored on my local device or in the cloud? Microsoft Teams recordings are typically stored in the cloud, specifically in Microsoft Stream. They are not stored locally on your device unless you choose to download them.
Knowing where do Teams recordings go or, instead, where are Teams recordings stored makes the most of your virtual meetings and ensures valuable resources for future reference and collaboration. You may also want to read how to set status timeout in Microsoft Teams.